
안녕하세요
6월16일22일차 - fullpage, 동영상삽입, youtube배경만들기 본문
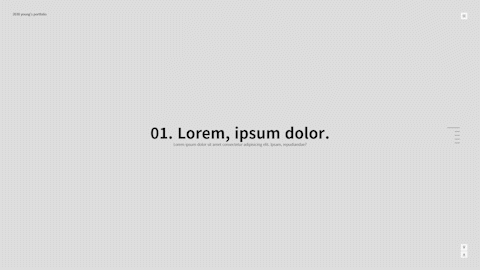
[fullpage를 구현합니다. 휠이나 버튼 클릭에 반응하여 화면 높이 단위로 이동합니다.] [220616-fullpage-html-css-js]
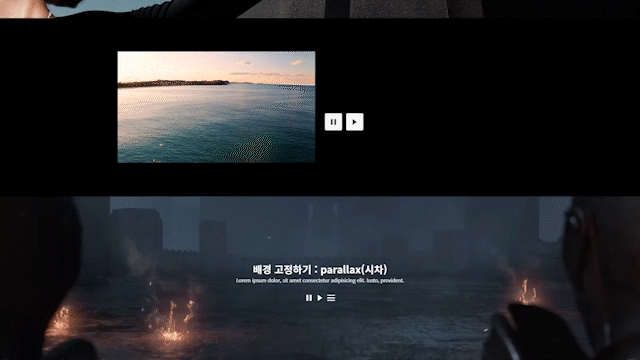
[mp4 동영상 삽입하거나, youtube 동영상을 배경으로 구현합니다.] [220616-동영상-html-css-js]
fullpage와 youtube 동영상을 배경으로 만들기라는 멋있는 기술을 두 개나 배웠습니다.
오후에는 이력서 교육을 받았기 때문에 복습할 시간이 평소보다 적었습니다.
이번 주말에는 배운 내용 총 집합으로 사이트를 하나 구현해보려합니다.
prettier - 길어진 attr로 인해 자동 줄바꿈이 생길 때 줄바꿈을 방지하는 방법입니다.
Print width 속성의 값이 80으로 되어있는데 100~160으로 조절해주면 됩니다.
직접 업로드, youtube 소스코드 업로드 두 가지 동영상 집어넣기 방법을 배웁니다.
동영상을 넣을 때는 용량이 크기 때문에 트래픽 제한에 걸릴 수 있습니다.
따라서 다른 서버에 있는 영상을 가져와 이용합니다.
유튜브는 원본 동영상에 비해서 조금 잘린 이미지를 들고오게 되는 문제가 있습니다. 큰 문제는 아닙니다.
동영상 이미지는 mp4로 업로드를 하게 됩니다.
pixabay에서 많은 동영상을 찾을 수 있습니다.
동영상 업로드는 video tag 안에 넣습니다.
<div class="left">
<video src="../img/movie01.mp4"></video>
</div>
autoplay는 비디오 자동재생입니다.
<video src="../img/movie01.mp4" autoplay></video>
muted는 소리 없애기 입니다.
<video src="../img/movie01.mp4" autoplay muted></video>
playsinline은 아이폰이나 사파리에서 새 창으로 열리는 것을 방지합니다.
<video src="../img/movie01.mp4" autoplay muted playsinline></video>
column을 적용하면 가로 세로 축이 바뀝니다.
y축을 기준으로 가운데로 배열하기 위해서는 align-items가 아닌 justify-content : center; 입니다.
.movie01 .right {
display: flex;
flex-direction: column;
justify-content: center;
}
align-items로 y축을 기준으로 하는 가운데 정렬을 하려면 box를 하나 더 싸주면 됩니다.
<div class="right">
<div class="inner">
<h2>mp4 동영상 플레이</h2>
<p>Lorem ipsum dolor sit amet consectetur.</p>
</div>
</div>
.movie01 .right {
display: flex;
align-items: center;
}
.trigger("pause")로 video에 pause 기능을 넣습니다.
우선 video에 클래스를 부여합니다.
<video src="../img/movie01.mp4" autoplay muted playsinline class="vd01"></video>
js 로 video를 선택한 뒤 .trigger("pause") 속성을 줍니다.
$(function () {
$(".movie01 .right i:nth-child(1)").on("click", function () {
$(".vd01").trigger("pause");
});
});
.trigger("play");는 play 기능입니다.
$(".vd01").trigger("play");
유튜브 동영상을 넣는 방법입니다. YTPlayer를 이용합니다.
https://github.com/pupunzi/jquery.mb.YTPlayer
https://pupunzi.com/mb.components/mb.YTPlayer/demo/demo.html
동영상을 background로 만들어 봅니다.
사용 설명서에 따라 css와 js 파일을 넣고 준비합니다.
<link href="css/jquery.mb.YTPlayer.min.css" media="all" rel="stylesheet" type="text/css">
<script src="inc/jquery.mb.YTPlayer.js"></script>
형식에 따라 html을 입력하고,
<section class="movie002">
<div id="bgndVideo" class="player">My video</div>
</section>
js 펑션을 실행합니다.
jQuery("#[playerID]").YTPlayer();
가독성을 높이기 위해 data-property는 html이 아닌 js에서 작업하도록 합니다.
$("#bgndVideo").YTPlayer({
videoURL: "http://youtu.be/BsekcY04xvQ",
containment: "body",
autoPlay: true,
mute: true,
startAt: 0,
opacity: 1,
});
컨트롤러를 없앨 수 있습니다.
showControls: false,
원하는 비디오의 url은 videoURL: ""에 넣습니다.
videoURL: "https://www.youtube.com/watch?v=Pmt3tms9HdI",
시작지점은 startAt: [number] 입니다.
startAt: 20, //초 단위 입니다.
stopMovieOnBlur: false, 윈도우 focus를 벗어나도 재생하도록 할 수 있습니다.
stopMovieOnBlur: false, //윈도우 focus를 벗어나도 재생되도록 합니다.
playOnlyIfVisible: true, 화면 안에 동영상이 일정 부분 이상 포함되어 있을 경우에만 재생되도록 합니다.
playOnlyIfVisible: true,
재생, 멈춤, 볼륨 등 동영상 조작 버튼을 커스텀할 수 있습니다.
$(".movie02 i:nth-child(1)").on("click", function () {
$("#bgndVideo").YTPPause();
});
$(".movie02 i:nth-child(2)").on("click", function () {
$("#bgndVideo").YTPPlay();
});
$(".movie02 i:nth-child(3)").on("click", function () {
$("#bgndVideo").YTPUnmute();
});
풀 페이지는 높은 접근성이 장점입니다. 휠 조작만으로 모든 것을 보여줄 수 있기 때문입니다.
풀 페이지를 만드는 방법입니다.
https://alvarotrigo.com/fullPage/ko/
설명서를 따라 css와 js 파일을 넣습니다.
<link rel="stylesheet" type="text/css" href="fullpage.css" />
<script type="text/javascript" src="fullpage.js"></script>
shortcut : 클래스를 두 개 이상 넣으려면 .classNama1.className2 처럼 입력하면 됩니다.
section*5.section.portfolio0$
먼저 html 구조를 만듭니다.
<main id="portfolio">
<section class="section portfolio01">01</section>
<section class="section portfolio02">02</section>
<section class="section portfolio03">03</section>
</main>
js로 fullpage()를 적용하면 완성됩니다.
$(function () {
$("#portfolio").fullpage();
});
navigation: true, 속성으로 현재 페이지를 나타내는 버튼을 추가할 수 있습니다.
$("#portfolio").fullpage({
navigation: true,
});
anchors: [ ] 속성을 이용하면 hash를 이용하여 원하는 슬라이드로 이동이 가능합니다.
a 태그로 href를 지정하면 됩니다.
$("#portfolio").fullpage({
anchors: ["p01", "p02", "p03", "p04", "p05"],
});
페이지를 슬라이드 해보면 url이 변하는 것을 확인할 수 있습니다.
/doc/fullpage01.html#p01
/doc/fullpage01.html#p02
...
/doc/fullpage01.html#undefined // 페이지가 존재하지 않는 경우에는 undefined로 표시됩니다.
클래스 on을 활용하여 애니메이션을 이용할 수 있습니다.
destination.index로 이동한 class에 on을 붙일 수 있습니다.
$("#portfolio").fullpage({
anchors: ["p01", "p02", "p03", "p04", "p05"],
afterLoad: function (origin, destination, direction, trigger) {
$(".section").eq(destination.index).addClass("on").siblings().removeClass("on");
},
});
loopTop 속성과 loopBottom 속성으로 첫번째 구역과 마지막 구역에서의 이동 여부를 선택할 수 있습니다.
loopTop: true,
loopBottom: true,
onLeave 를 이용하면 슬라이드를 이동하면서 animation을 실행할 수 있습니다.
하지만 event가 발생을 해야 함수가 실행되기 때문에 초기 화면에는 적용이 안됩니다.
따라서 초기화면에서는 afterLoad로 animation을 실행하도록 하고,
이후 부터는 onLeave 함수를 event에 반응하여 실행하도록 합니다.
afterLoad: function (origin, destination, direction, trigger) {
$(".section").eq(destination.index).addClass("on");
$("nav li").eq(destination.index).addClass("on");
},
onLeave: function (origin, destination, direction, trigger) {
$(".section").eq(destination.index).addClass("on").siblings().removeClass("on");
$("nav li").eq(destination.index).addClass("on").siblings().removeClass("on");
},
'프론트엔드 국비교육' 카테고리의 다른 글
| 5주차 정리(06/13~06/17) (0) | 2022.06.18 |
|---|---|
| 6월17일23일차 - tab menu(slick-visibility), 지도에 위치 표시 (0) | 2022.06.17 |
| 6월15일21일차 - slide-up page num, gage, play-pause btn (0) | 2022.06.16 |
| 6월14일20일차 - 2중 슬라이드, 슬라이드 내용 바꾸기 (0) | 2022.06.14 |
| 6월13일19일차 - 슬라이드, 상단 이동버튼 복습 (0) | 2022.06.13 |


